Showing posts with label shutter speed. Show all posts

Monday, September 14, 2009

The Basics - Aperture

Aperture is one of those photography terms that intimated me at first. It sounds quite technical, and even the units, F-Numbers, don’t make a lot of sense. Changing your aperture is a very powerful tool to a photographer, and there are many reasons why you’d chose a certain value, however, it again all comes down to light. In combination with shutter speed, aperture controls the amount of light hitting your image sensor. The more light, the brighter your image, the less light, the darker your image.

Technically, aperture refers to the size of the opening in the lens. Take a look at the example below. The top image is a wide or large aperture (lots of light), while the bottom image is a smaller aperture (just a small amount of light).

The other hard to grasp part of aperture is the numbering system. Aperture uses F-numbers or F-stops. It seems counter intuitive to me, however, the smaller the number, the larger the opening. So in the pictures above, the top lens might have an aperture of f/2 while the lower image has f/16. A trick I use to help me remember how F-numbers work was given to me by my photography professor… “think about inflating a cartoon bike tire. If you inflate it with a lot of pressure, the hole in the middle will get smaller” More pressure = tighter aperture = higher F-Number. Not sure if that helps you, but it works for me.

These images are all shot keeping the shutter speed constant and just adjusting aperture (which will cause them to be under/over exposed).

Overexposed with wide aperture: 1/10 sec, f/5.6

Over exp Wide Ap


Proper Exposure with medium aperture: 1/10 sec, f/11

Expose Med Ap


Underexposed with small aperture (big f-number): 1/10 sec, f/22

Under expose small Ap


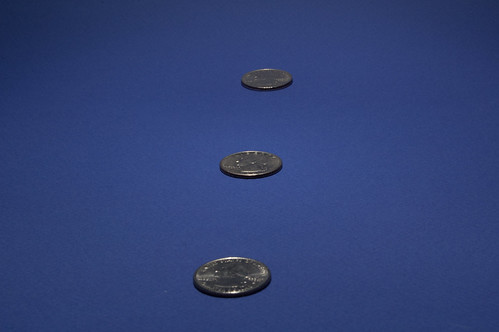
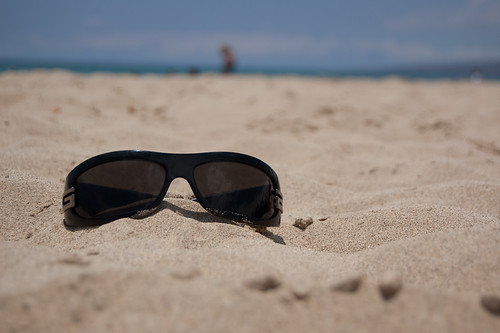
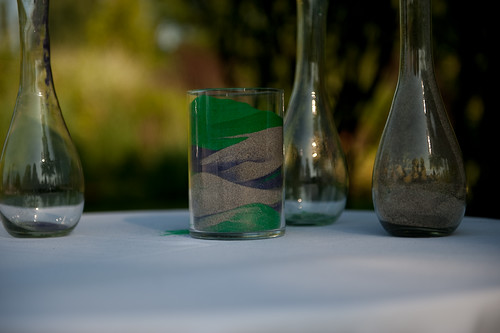
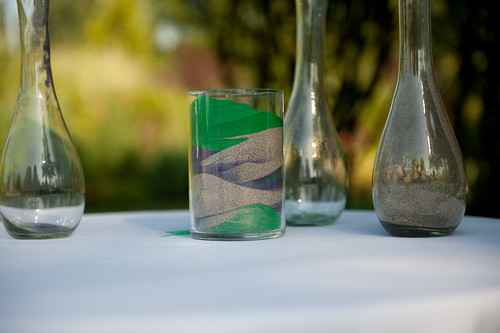
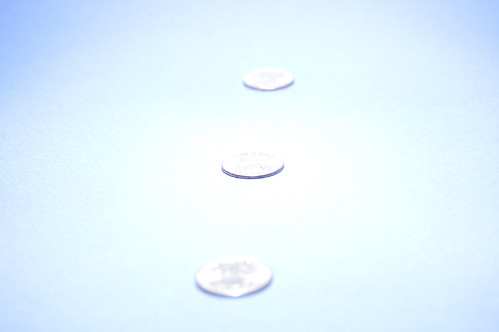
Aperture also has another effect on your images beyond how bright or dark your image is. After all, why would you need 2 ways to control this, shutter speed and aperture. What aperture does is also change the amount of your image that is in focus. This is referred to as the depth of field. I’ll cover depth of field in a later post, however, to illustrate the effects, take a look at the three images I’ve shot below.

Exposed properly, but with different aperture/shutter speed combinations, so you can see the depth of field effects.

½ sec, f /22 (all 3 quarters are in focus) – Slow shutter speed because aperture is small. This lets in enough light.

Big DOF


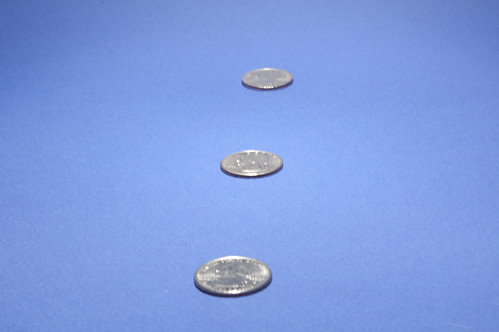
1/10 sec, f/11 (Center quarter is in focus, but back is out of focus, and most of front is out of focus) – Faster shutter speed because less light is needed when aperture is larger.

Med DOF


1/40 sec. f/5.6 (center quarter is the only one that is in focus) – Even faster shutter speed because aperture is all the way open.

Small DOF


This was another resource that I found helpful if you want to learn more:

http://www.photoaficionado.com/situationroom/aperture.html

Saturday, August 29, 2009

Shutter Speed

Shutter speed refers to the amount of time that your image sensor is exposed to light. Refer back to my earlier post on the anatomy of a DSLR, and you’ll see that the shutter is in front of the image sensor. So, the “faster” your shutter speed, the less time light (which is the image) is hitting the image. “Slower” shutter speeds, means that the image sensor is exposed for a longer period of time.

Shutters are normally very fast… fractions of a second. That’s all the light you need to make a photo. Shutter speeds range from about 1/6000th of a second to about 8 seconds. The light you have available to take a picture, determines how you set your shutter speed. 8 seconds, (denoted 8” on the back of the camera) would be used for incredibly low light (ie, Taking pictures of the stars). 1/6000th of a second (denoted 6000 on the back of the camera) would be used for taking pictures when there is a lot of light available (ie, middle of the day, pointed at the sun).

Under normal, daytime conditions, I shoot in the range of 1/60th to 1/3200th of a second. I generally try to use the fastest speed that the light will allow. The faster the shutter, the less chance I will cause the image to be blurry by shaking the camera. This type of blur is called “motion blur”, and causes everything in your pictures to appear out of focus. If I’m going to hand-hold my camera (not use a tripod), I won’t set it below 1/60th of a second. It is next to impossible to hold still enough at this speed.

Take a look at the three photos below to see the effects of shutter speed. I’ve kept all the variables the same (Subject, time of day, aperture, white balance, iso camera location) except shutter speed.


This image has the “fastest” shutter speed. 1/2500th of a second.

Sunglasses 1/2500 sec f/5.3


This image is a little slower. 1/2500th of a second.

Sunglasses 1/1250 sec f/5.3


This is the slowest image 1/800th of a second.

Sunglasses 1/800 sec f/5.3

Notice that the photos get darker the faster the shutter speed is. This is because less light is hitting the sensor. 1/2500th of a second’s worth of light vs. 1/800th of a second.

So, when shooting in the manual mode, I set the aperture, and then adjust the shutter speed until the image is exposed properly. The camera will also do this automatically for you if you shoot in Aperture Priority Mode.

Friday, August 21, 2009

Photography: It’s all about Light

When thinking about photography, it all really comes down to light. That’s what goes onto the cameras sensor, and that is what makes an image. Exposing the perfect picture comes down to your ability to control the light that comes into the camera. There are three settings on your camera that really control the light coming in.

  1. 1. Aperture: The size of the “hole” light comes through to your sensor
  2. 2. Shutter Speed: The amount of time light is being captured by the sensor
  3. 3. ISO: The sensitivity of your sensor.

I’ll cover each of these in separate blog posts. But being able to control these three settings are what will enable you to capture that perfect shot. These all three come together to become the “exposure” of the picture. You’ve probably heard the term “overexposed” or “underexposed” before. By changing aperture, shutter speed, and ISO, you can control the amount of light in the picture and get the perfect exposure.

Below are three examples of exposure:


Underexposure

Underexposed


Overexposure

Overexposed
Correct Exposure
Exposed

Thursday, March 19, 2009

Consumer Model Cameras with Advanced Settings

These cameras are generally larger and more expensive than the point and shoot cameras. The reason to use the advanced cameras over a point and shoot is they allow the photographer to change some key settings:
• Aperture
• Shutter Speed
• White balance

As you become more advanced with your photography, you will begin to use these settings to get the desired effects from lighting, focus, and color. The Consumer Models let you change these settings (although they are buried in the menus of the camera). A great example is the Canon PowerShot A720IS (http://www.dpreview.com/reviews/canona720is/). It allows the user to shoot in Manual mode (set both aperture and shutter speed) to have more control over the images.

The difference between these cameras and their D-SLR counterparts are interchangeable lenses, and on-camera controls for adjusting aperture and shutter speed. If you are shooting a lot of pictures in changing light conditions, it is pretty annoying to have to keep navigating through menus to update these settings.

All in all, these are great for cost conscious photographers who want to learn photography, but don’t want to invest in an expensive D-SLR.